How to Assign a Macro to a Button in Excel
March 07, 2018
Running macros in your worksheet is a tremendous help. You can automate so many things with VBA that there have been countless books written on the topic. However, it’s not always so simple to run a macro. Your users may not know how to run a macro and you want to make it easy for your users to get their work done. Wouldn’t it be great to have a button on your worksheet and you can tell your users “Just click on this and such-and-such will be done automatically”?
That’s what this post is all about. Let’s get started.
Assign a Macro to a Simple Button
To begin, you’ll need to have the Developer Tab enabled. Click here for more info on that.
After you have the developer tab enabled, open up the Visual Basic Editor, add a new module and let’s add this simple code snippet in there:
Option Explicit

Public Sub WriteHello()
  Dim cell As Range
  Set cell = Selection
  cell.Value = "Hello, cell!"
End Sub
This will be our simple macro to run when we click on our button.
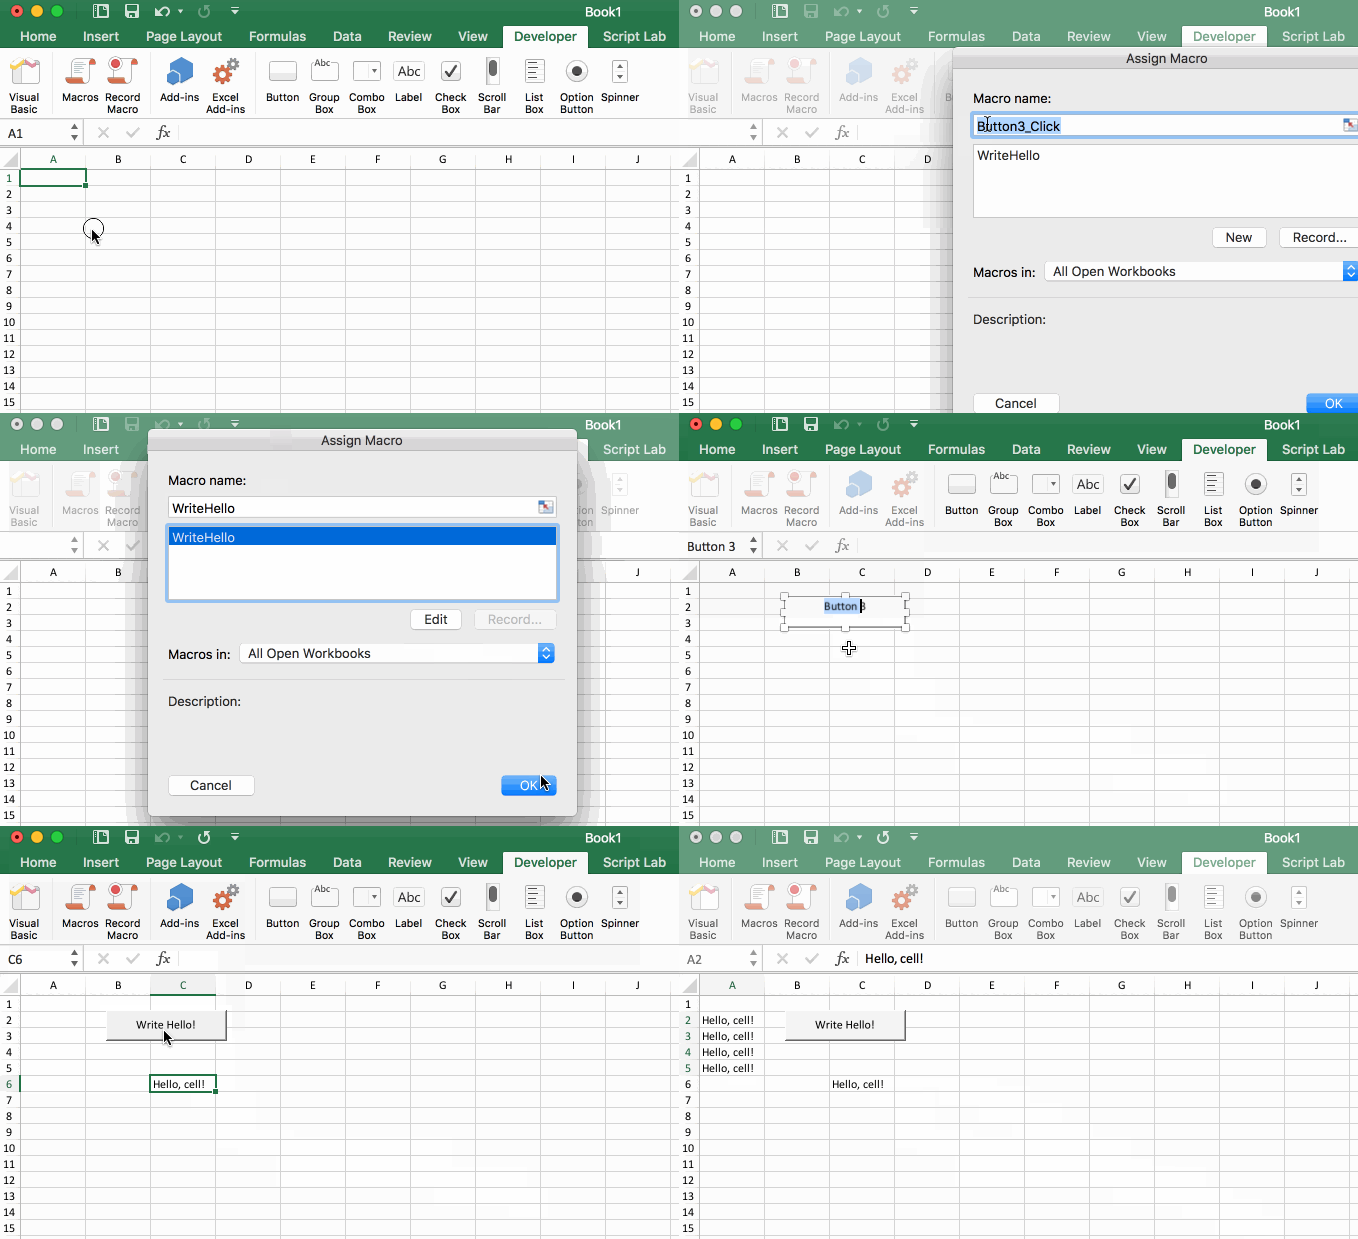
Since we have the Developer Tab enabled, we can create a button and assign it to a macro:
- In the Developer Tab of the ribbon, simply click on Button (in Windows, click on Insert, and then under Form Controls, click on Button)
- Then click on the Worksheet to add the button.
- Excel will then ask you to assign it to a macro. Use the WriteHello macro that we put in our VBE.
- The button will then be in Edit mode. This is where you can change the text inside it. Make the text whatever you like. You can also resize the button while it is in edit mode.
- Then click on the worksheet away from the button to get it out of edit mode. You are now able to click on your button and run the macro!
Here’s an animated gif to help illustrate the point:

Assign a Macro to a Shape
Now that we have the main idea down, let’s add some style to our worksheet. Using the Button from the Developer Tab is not the only way to run a macro from a button. You can also use Excel Shapes!
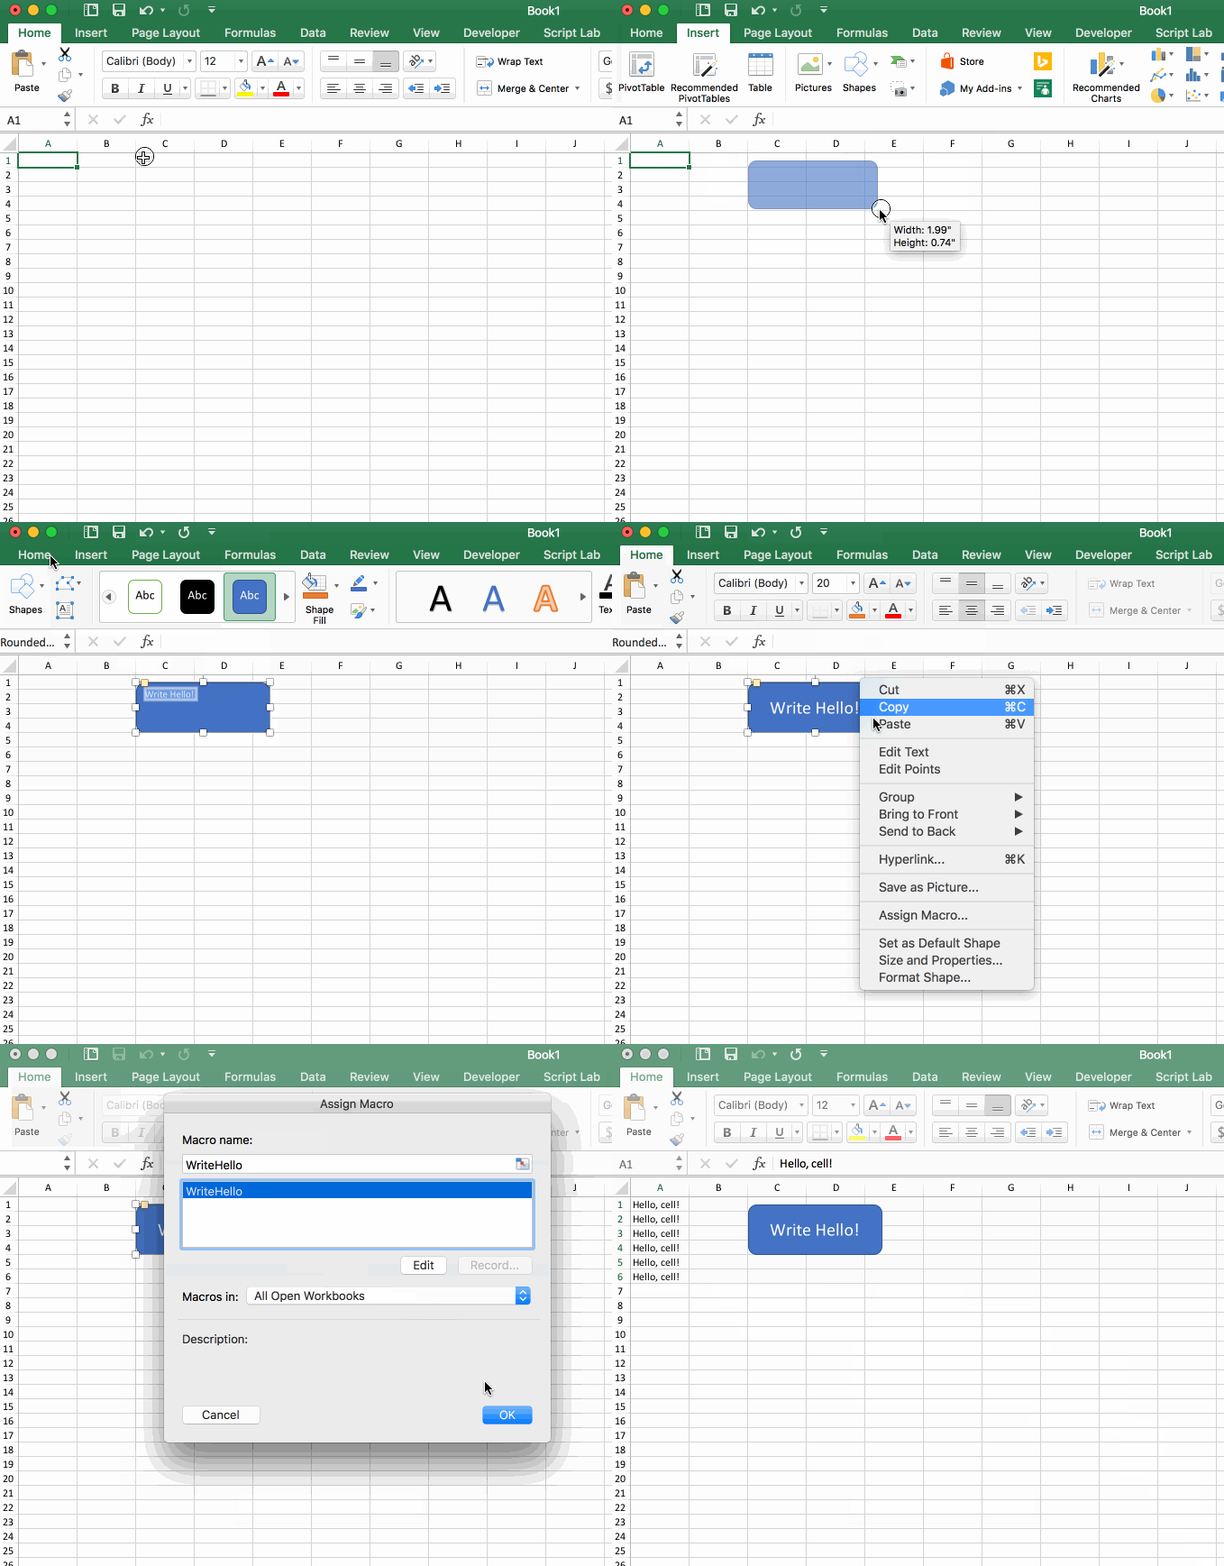
To achieve this, we follow a similar procedure from before, but the difference is where we get our button from. Here are the steps to assign a macro to a shape in your worksheet:
- Click on the Insert tab in the ribbon
- Click on Shapes
- Select a Shape (I used a rounded rectangle)
- Click and drag on the worksheet to set the size of the shape
- You can then write some text. You can also format this text by selecting it and going to the Home tab and adjusting the text size, center justify, and center vertically.
- Then, right-click on the Shape and select Assign Macro.
- Pick the macro that we wrote.
- Then click on the worksheet to get the shape out of edit mode.
- You can now click on your shape (which is now a button) and run your macro!
Here’s an animated gif to show more detail:

Changing the Assigned Macro
To change the macro assigned to the button, simply right-click on it, then choose Assign Macro. From there, you can select a new macro to use.
Deleting the Button
To delete the button, you need to get it back into Edit Mode. To do this, right-click on the button. When you do this, the context menu will show up. You can click back to the worksheet (but DON’T double-click!) and you will still be in Edit Mode. From here, you can hit the Delete key on your keyboard and it will remove the button.