Pixelate Images in Excel Cells
April 19, 2016
Can you pixelate images in Excel? Or can you create an image in Excel by painting pixel-by-pixel? Well, a couple of years ago, I read an article about a Japanese man who was creating art using Excel. When I first heard about this, I immediately thought that he was painstakingly changing each cell’s background color to create his art (i.e. creating the image pixel-by-pixel). I thought, “wow…that guy has A LOT of time on his hands.”
Of course, that would just be crazy. Later, after I actually read the article, I found out that he was mostly using Excel Shapes to create his art. It’s still time consuming, but one of the most interesting uses of Excel I have ever seen. And he even made money from it!
However, that article got me wondering if I could do something similar like pixelate images into Excel cells - just as a fun idea.
And that’s what I did.
I thought it would be a fun challenge for myself, as well as give me some more experience using C# within Excel by creating a VSTO Add-In to pixelate images into Excel.
So, I’d like to share my experience in case it helps anyone else with creating VSTO Add-Ins in Excel using C#.
Too long; didn’t read
If you just want to check out the code and play with the C# Add-In, check out the github page.
One last note: if you’re wondering why I didn’t include a download of the Add-In so you can install it on your machine, it’s because I would need a code signing certificate registered with a Certificate Authority and those can be a little costly. Yes, technically I could use a self-signed cert, but I wouldn’t want you to get any of those “Are you sure you trust this Add-In?” warnings that Excel shows because they cannot verify where it came from.
OK, let’s get right to it!
Pixelating Images in Excel - Outline
This was my basic plan:
- Make this an Add-In with a button the user can click on in the Ribbon
- Ask the user for an image
- Take the image, and move through each pixel
- For each pixel, get the color of the pixel, and set the background color of the corresponding cell
- Adjust the cell size to make them more square than rectangular
- Host the Add-In somewhere so people can have some fun with it
Simple, right? Well, there were some hurdles to get over.
Let’s go through each step.
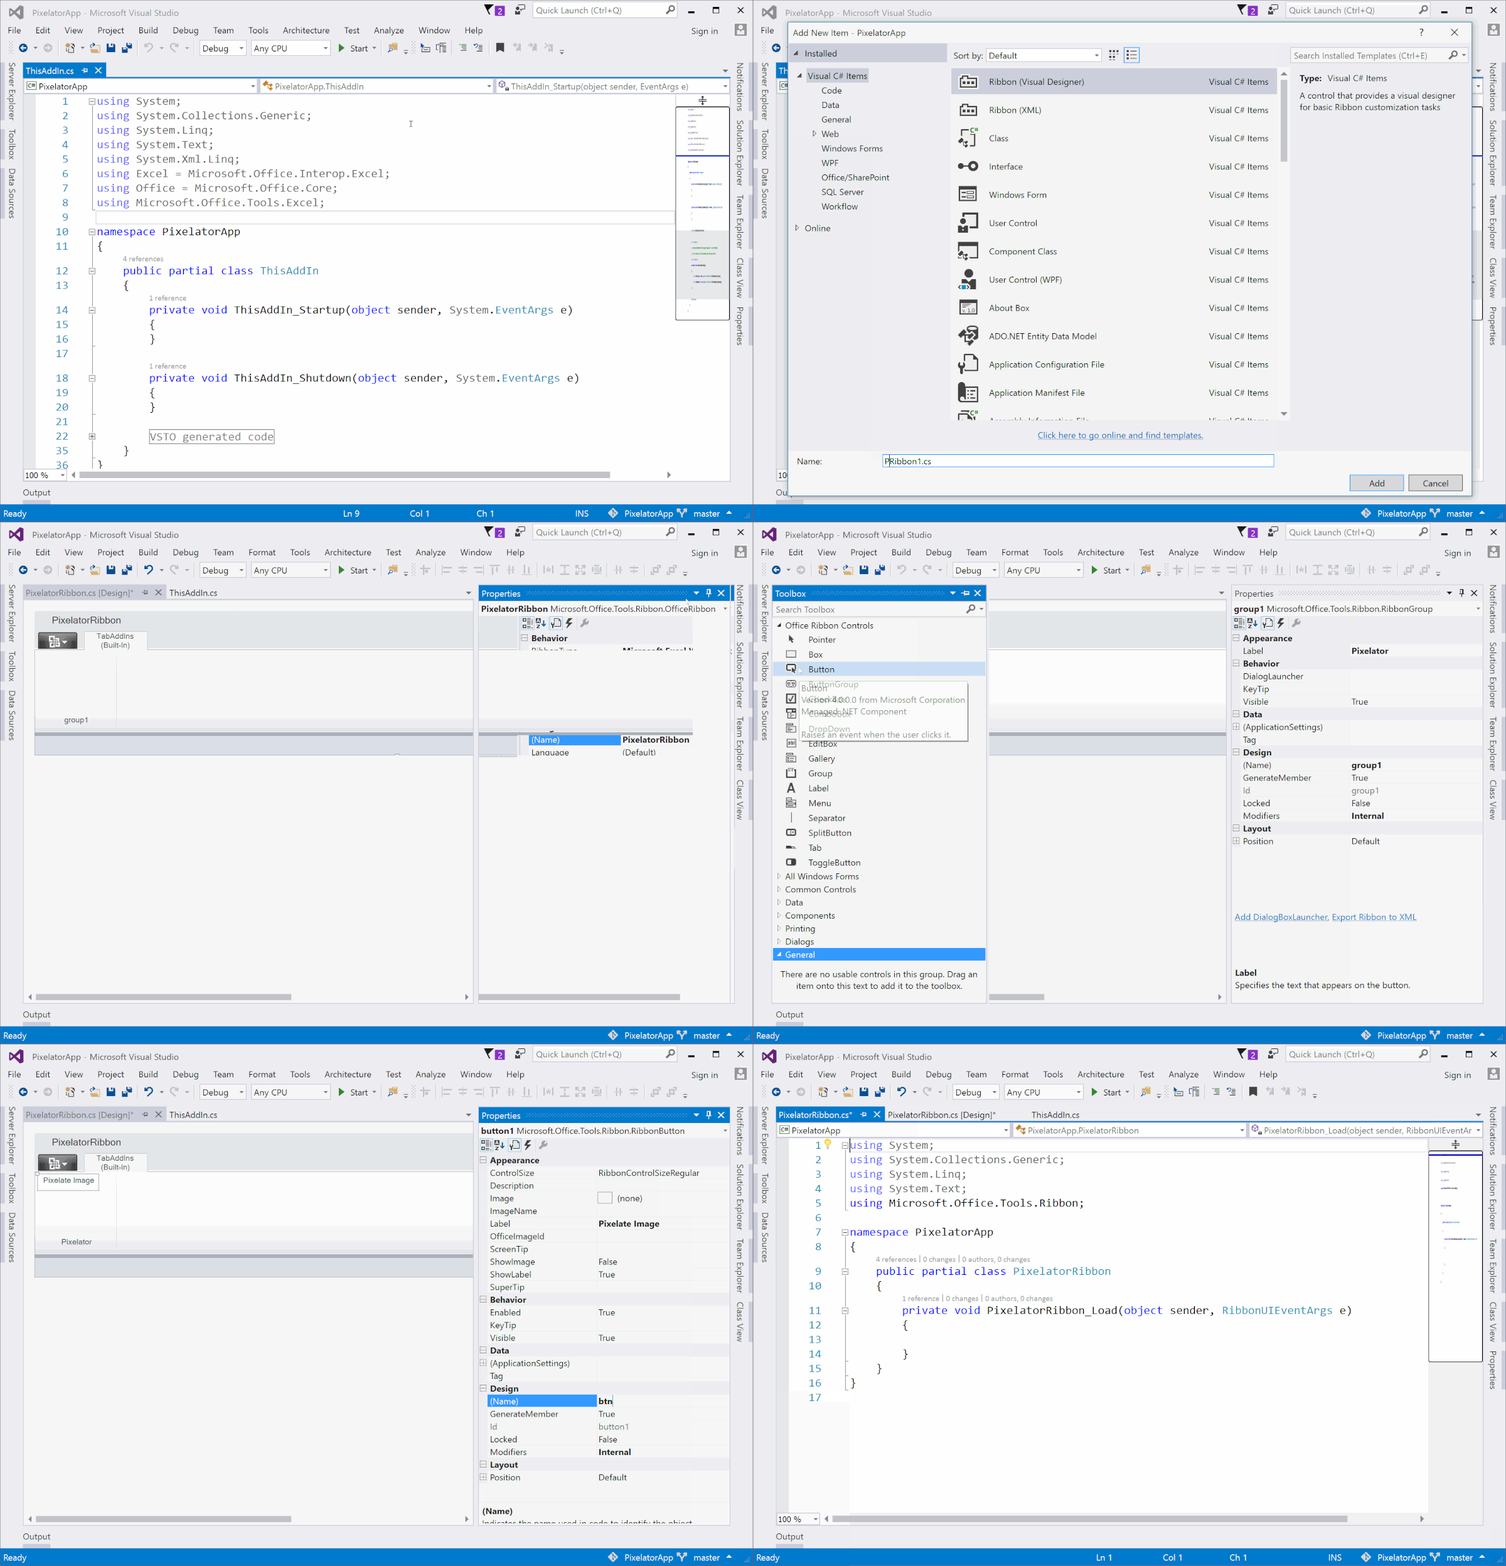
Create a new VSTO Project
We’ll start off by creating a new VSTO (Visual Studio Tools for Office) project to create the Add-In.
Add a Button to the Ribbon
Once we have the project ready-to-go, we’ll kick it off by adding a simple button to the Ribbon (this will go in the “Add-Ins” section of the Ribbon).
We do this by adding a New Item called the Ribbon (Visual Designer). Then, we’ll add a button to the Group so we can interact with the user.
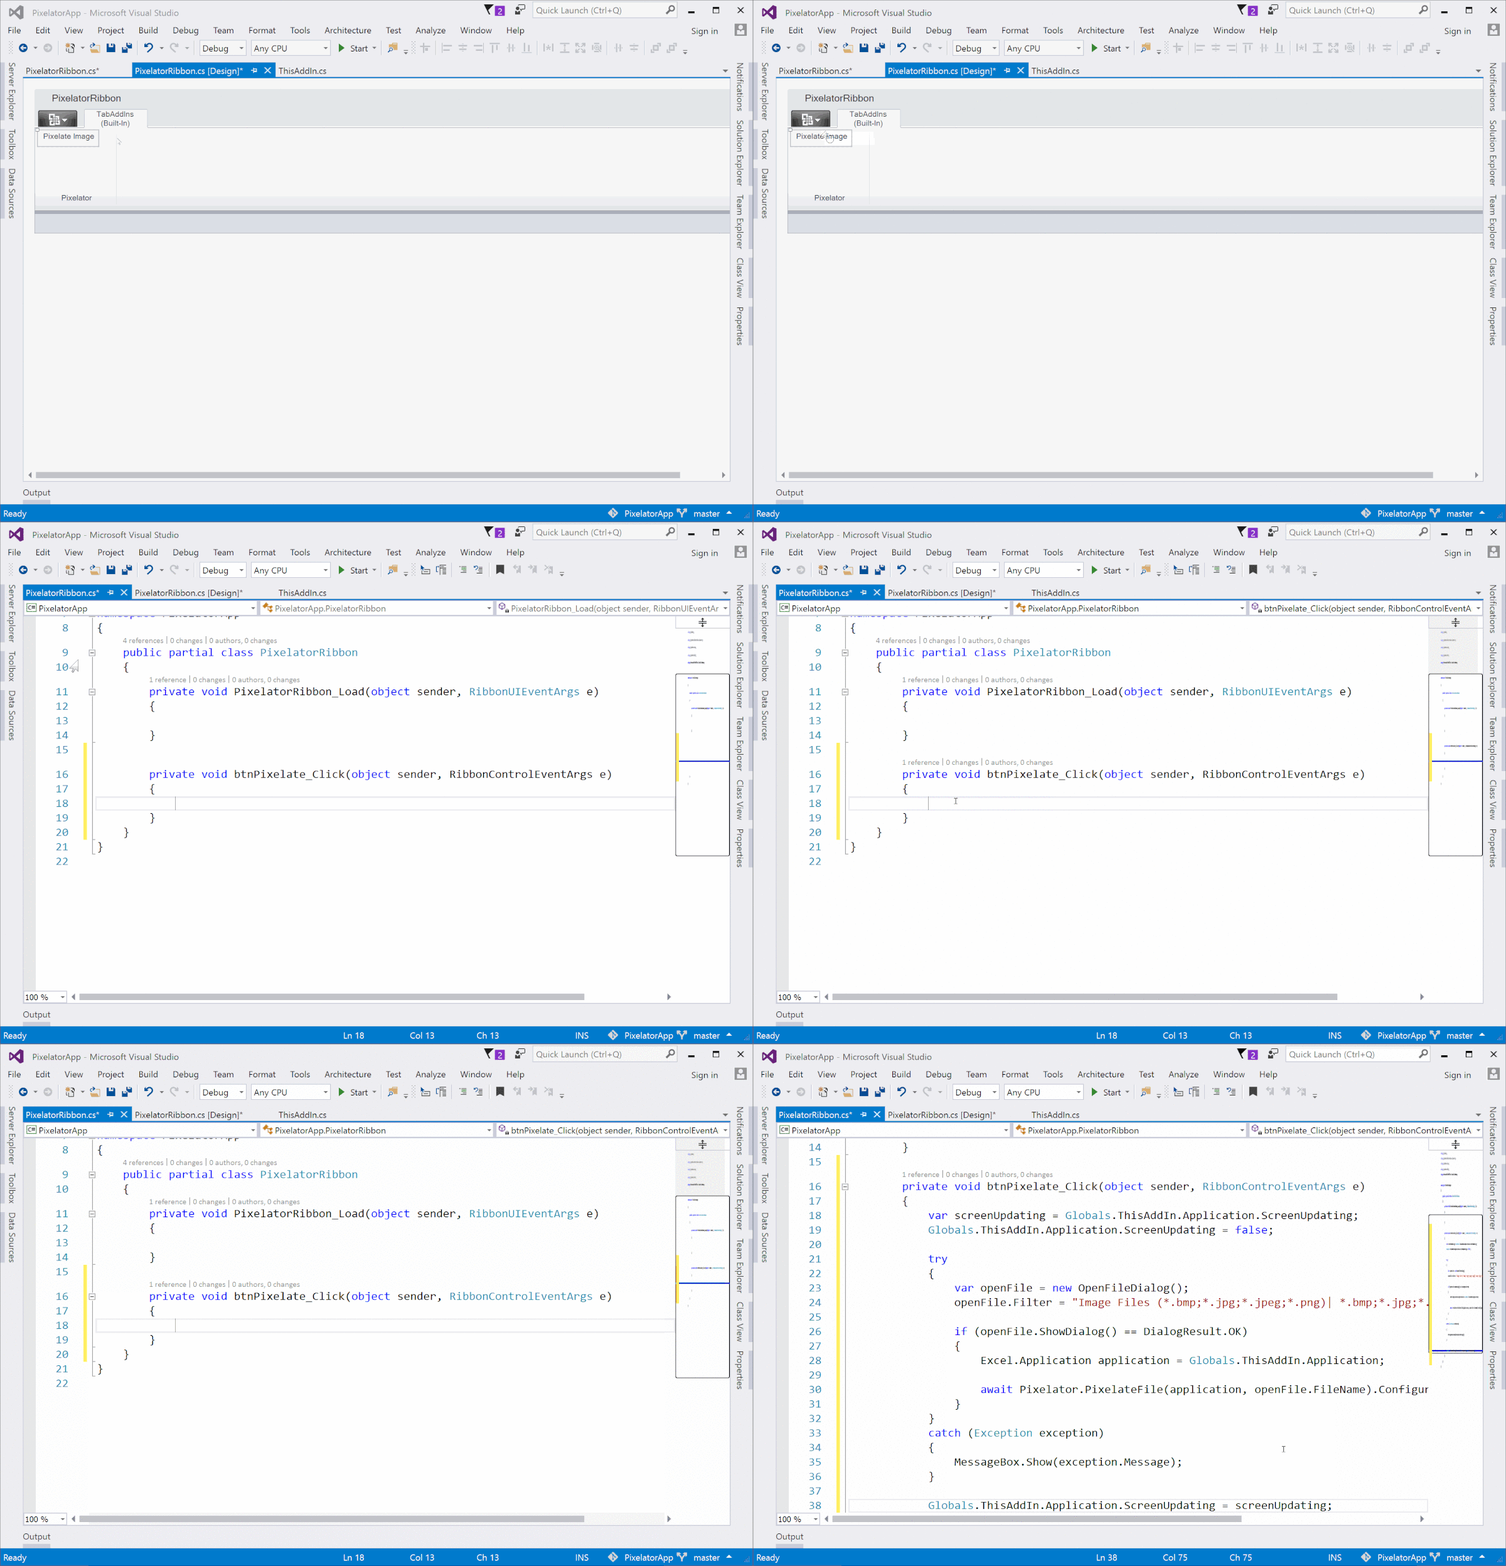
Add the Ribbon Button Code
Now let’s add the code for the Ribbon button for when we click the button.
To do this, double-click the Button in the Ribbon. A new method will be created within the Ribbon code that is associated with the button click.
Add Main Pixelator Code
Here is where I add the main Pixelator code. This code will assume an image has been passed to it (handled by the Button Click code). This will then utilize an ImageUtilities class (that I add in the next section) to help scale the image if it’s too large.
After that, this code will:
- Figure out the used range
- Resize the cells in the used range to be more square
- Work through the pixels of the image and place the color found in the corresponding cell
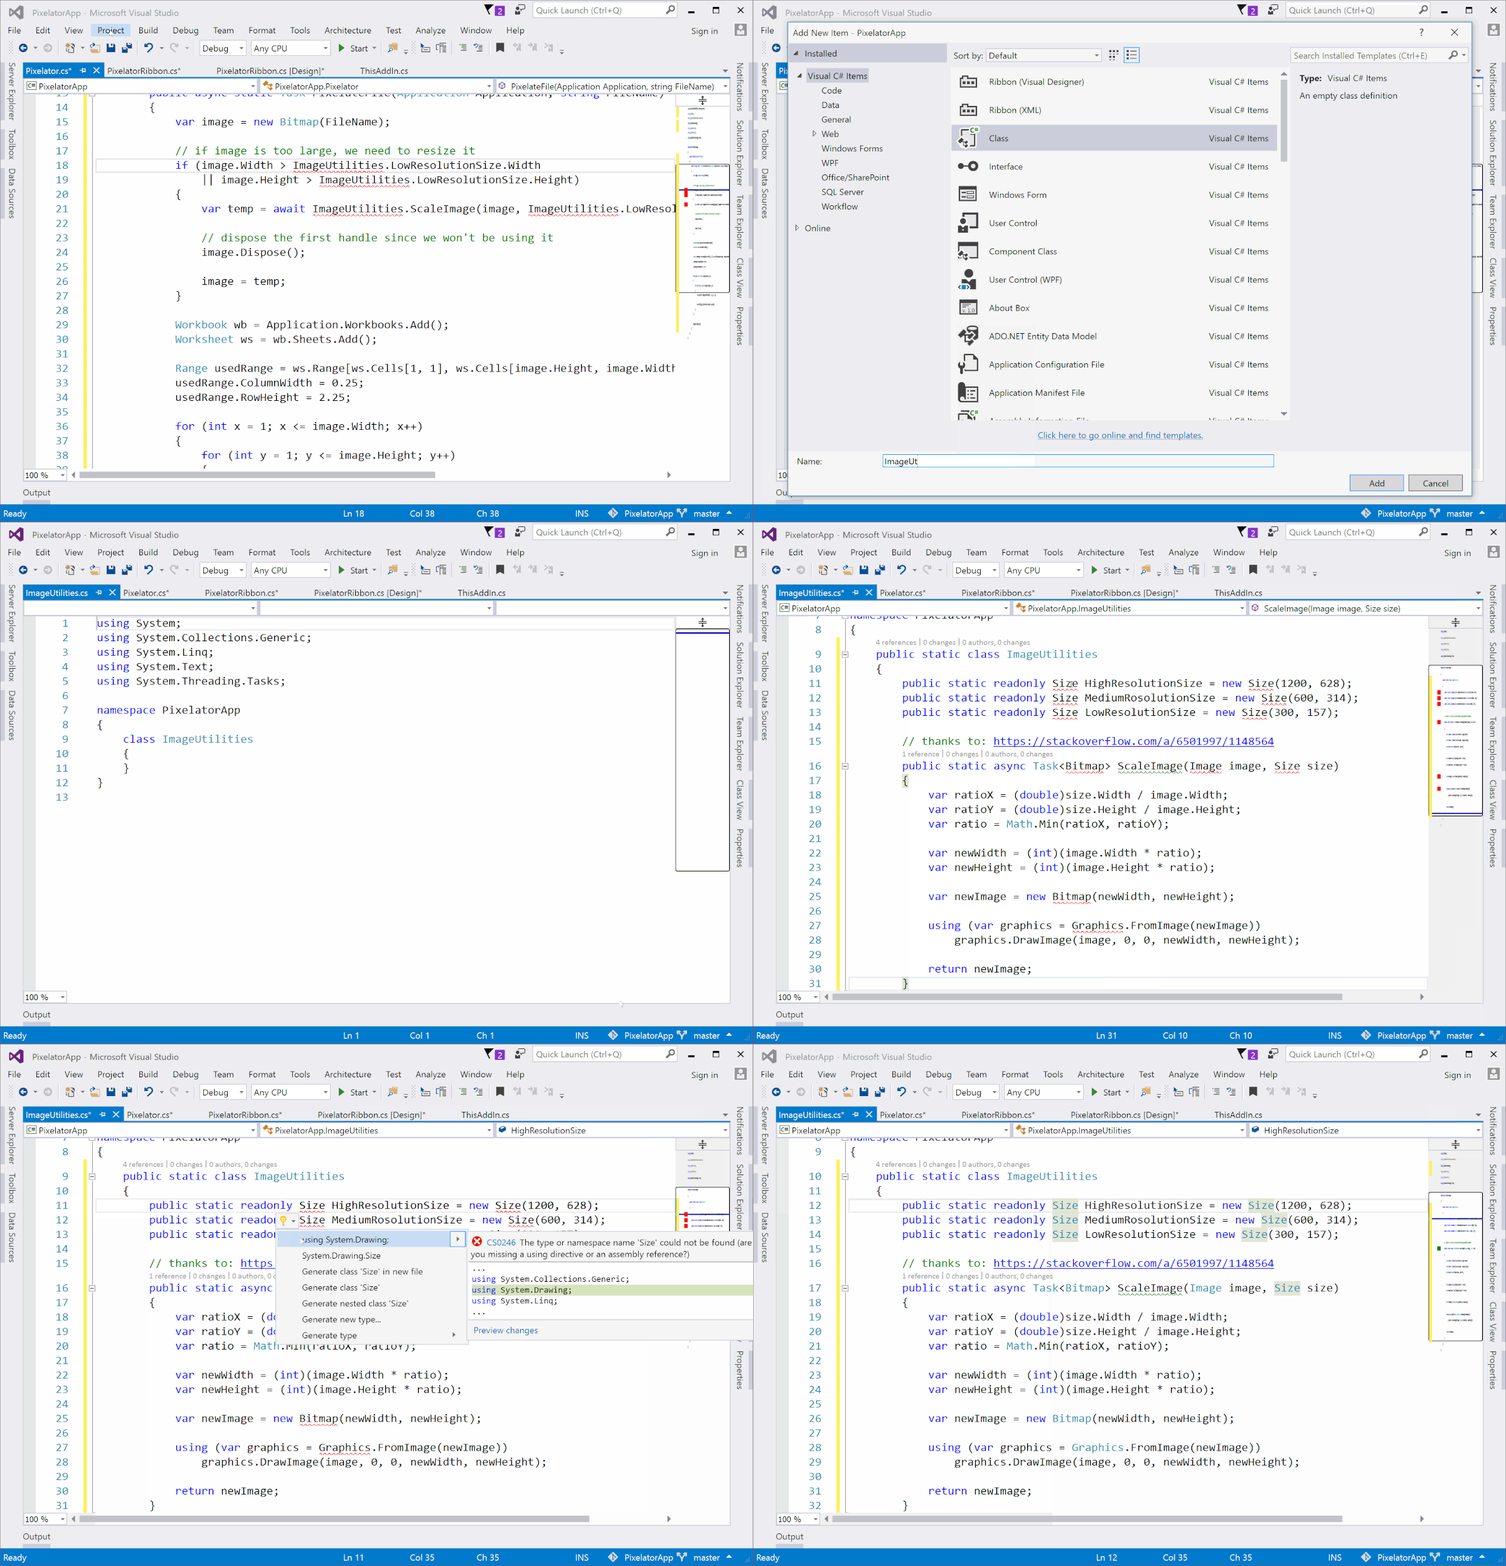
Add a Helper Class for Processing the Image
Here, I add another class to help me do the work of processing the image like resizing the image (link to the code source).
This is actually where I ran into a couple of “gotchas.” You might be wondering “Why are you re-sizing the image?” Good question.
When I was testing this Add-In, if I selected a large image, the Add-In would crash with:
ERROR: Too many different cell formats.
Well, it turns out that Excel 2007 and later can only support 64,000 different cell format combinations. This includes cell background colors. So, for larger images (or images with a ton of different colors), the Add-In may fail. To avoid this error, I reduced the size of the image. I also created a new workbook so there are 64,000 format combinations available, just in case people try to run this Add-In multiple times in the same workbook.
Fix Debug Info for Local Development
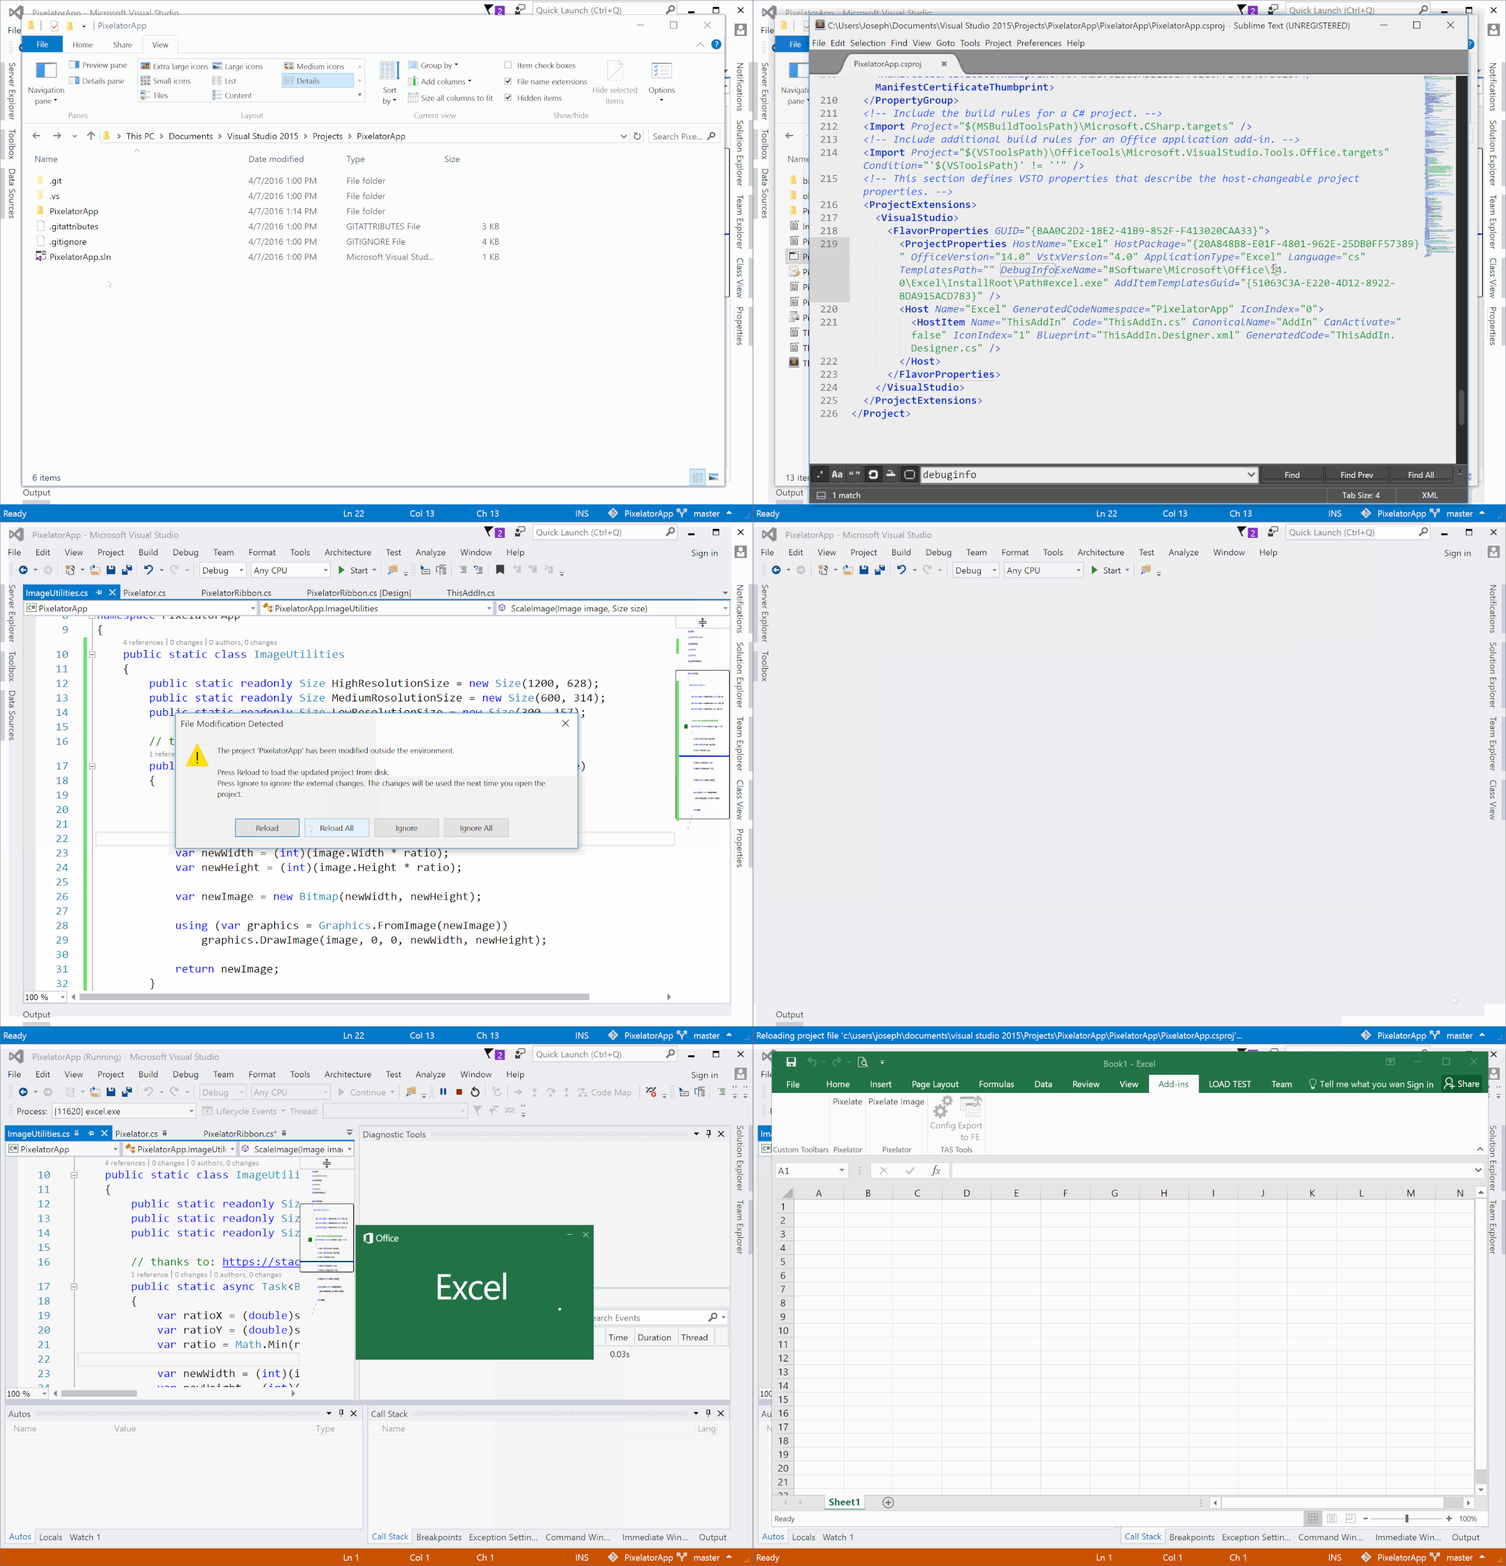
I wanted to make this Add-In for Excel 2010 and later, but my current version is Excel 2016. This is important because when I attempted to run the Add-In in debug mode, the app would not run, stating that the installed version of Excel is different than the debug version.
Why does this happen?
When I created the project, I said to create a 2010 Excel Add-In, so the debug properties in the csproj file has a special section that tells the debugger where a particular file is in my computer. In this case, the debug info was trying to reference Excel 2010’s directory for debugging, which didn’t exist in my machine. I had to open the project’s csproj file in a text editor (I really like Sublime Text) and modify the DebugInfoExeName attribute to use Excel 2016’s directory for debugging.
Now I can hit F5 and test out the Add-In.
Run the Pixelator Tool
Finally! We can run the Pixelator tool. From here, we just hit the Pixelate Image button from the Add-In tab and test out the app.
You can see from the animated GIF that what you’re seeing is not an image overlay, but rather the cells have their background color set to make it look just like the image that was selected.
I know this is a bit different from my usual posts, but I thought something unusual could be fun, just to change things up :) I hope you enjoyed it!

