VBA Ranges - Looping with For Each
August 23, 2017
In our last discussion about VBA Ranges, we learned how to get and set cells. In this post, I’d like to build on top of that knowledge by showing you how to loop through cells in VBA. There are a few ways to loop through cells with VBA, but in this post, we’ll focus on the For Each looping mechanism. We’ll cover other ways to loop through cells in future posts. Let’s get started.
For Each Syntax
The syntax of For Each is the following:
For Each [object] In [collection]
  [statements]
  [Exit For]
Next [object]| Item | Description |
|---|---|
object |
This is an object that will contain a reference to the current item within the collection. This is what you’ll be working with within the For Each loop. Also, specifying this in the Next statement is optional (but I recommend doing it to make nested loops easier to read). |
collection |
This is an object of a Collection data type. This object must contain one or more items to loop through in order to enter the For Each loop. |
Exit For |
This is another optional statement that, if executed, will exit the For Each loop even if there are more objects to process in the collection. |
For Each Basic Example
Here’s a simple For Each example:
Option Explicit

Public Sub UpdateTextUsingForEach()
    Dim cell As Excel.Range

    For Each cell In Selection
        cell.Value = cell.Value & " extra text"
    Next cell
End Sub
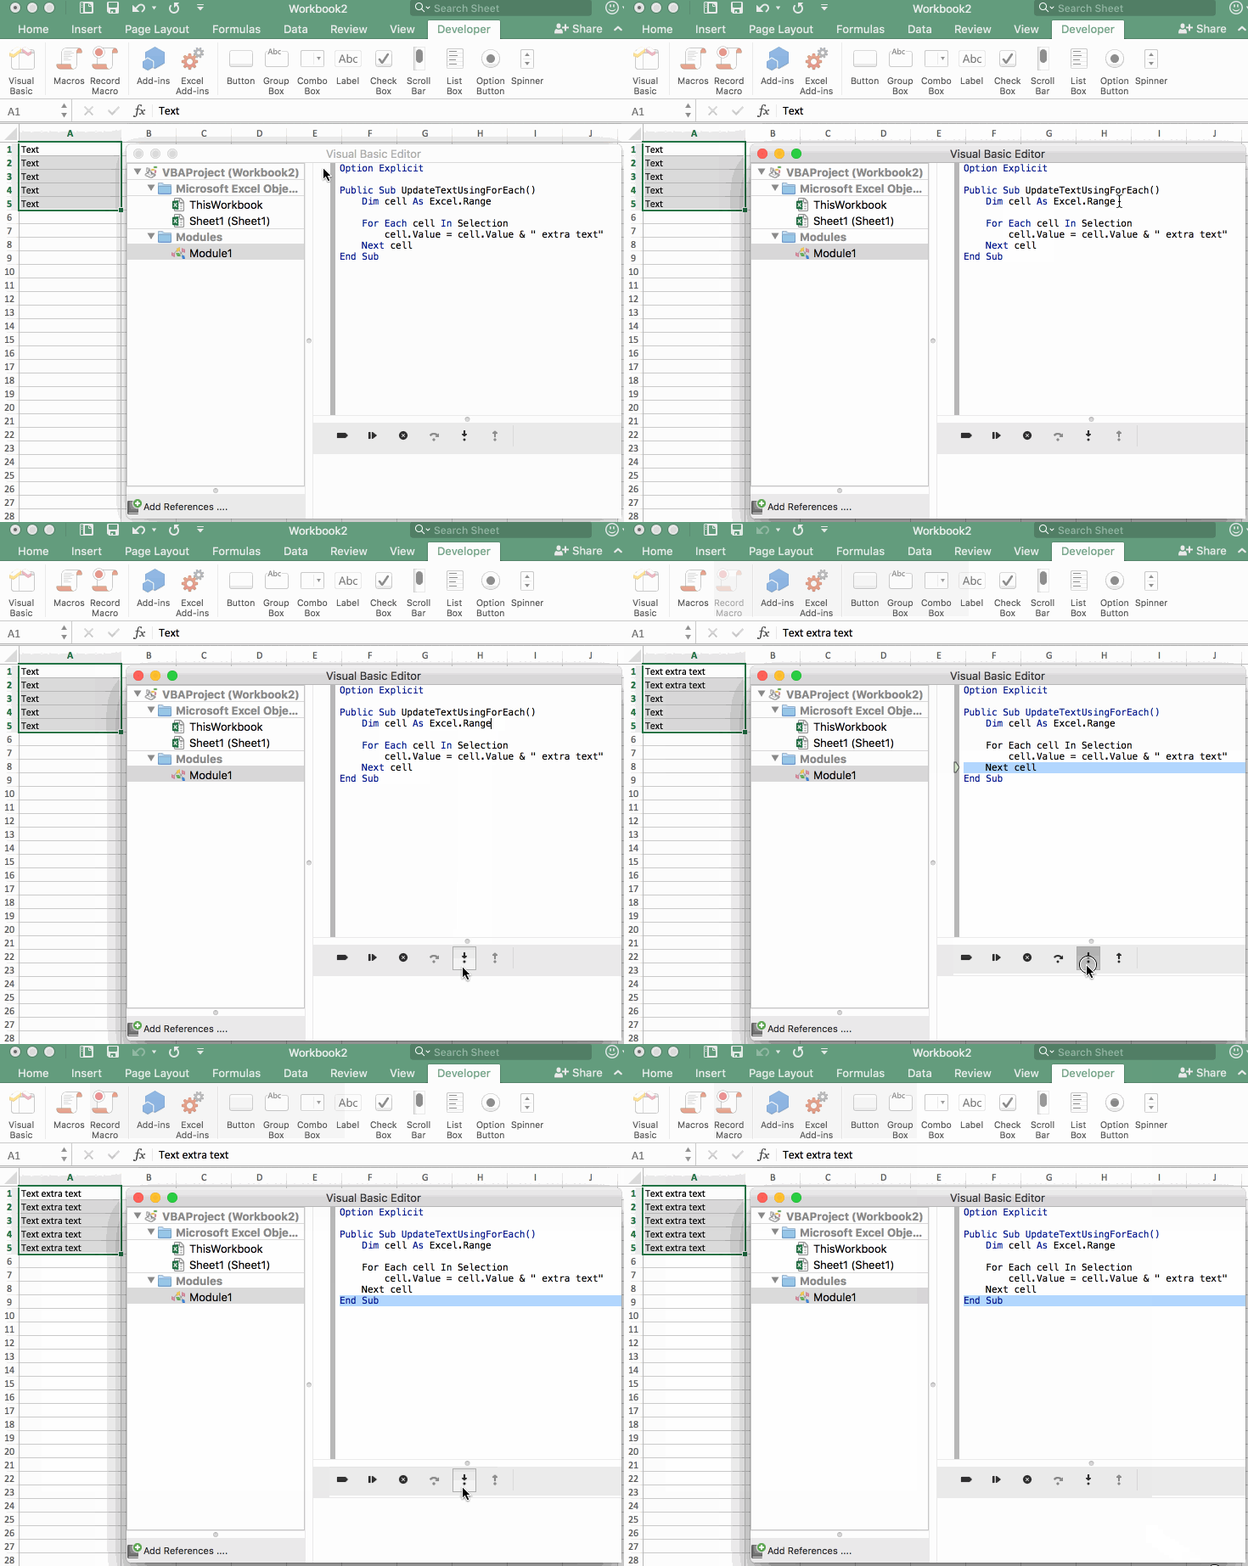
In this example, we simply loop through all of the cells in the current Selection and add some extra text to it. Here is this code in action:

For Each Example Skipping some Cells
Let’s say that we wanted to skip certain cells as we loop through them. For example, if we want to only add some extra text to cells that are not blank, we need to add a condition to check for that and then skip that cell and move on to the next.
In other languages, we could use the Continue keyword. Unfortunately, VBA
doesn’t have that option, but we can get around that with using a GoTo
statement.
Option Explicit

Public Sub UpdateTextUsingForEach()
    Dim cell As Excel.Range

    For Each cell In Selection
        If (cell.Value = "") Then
          GoTo Continue
        End If

        cell.Value = cell.Value & " extra text"
Continue:
    Next cell
End Sub
Here, we check if the cell’s value is blank and if so, we go to the Continue
label, which is at the end of the For Each loop.
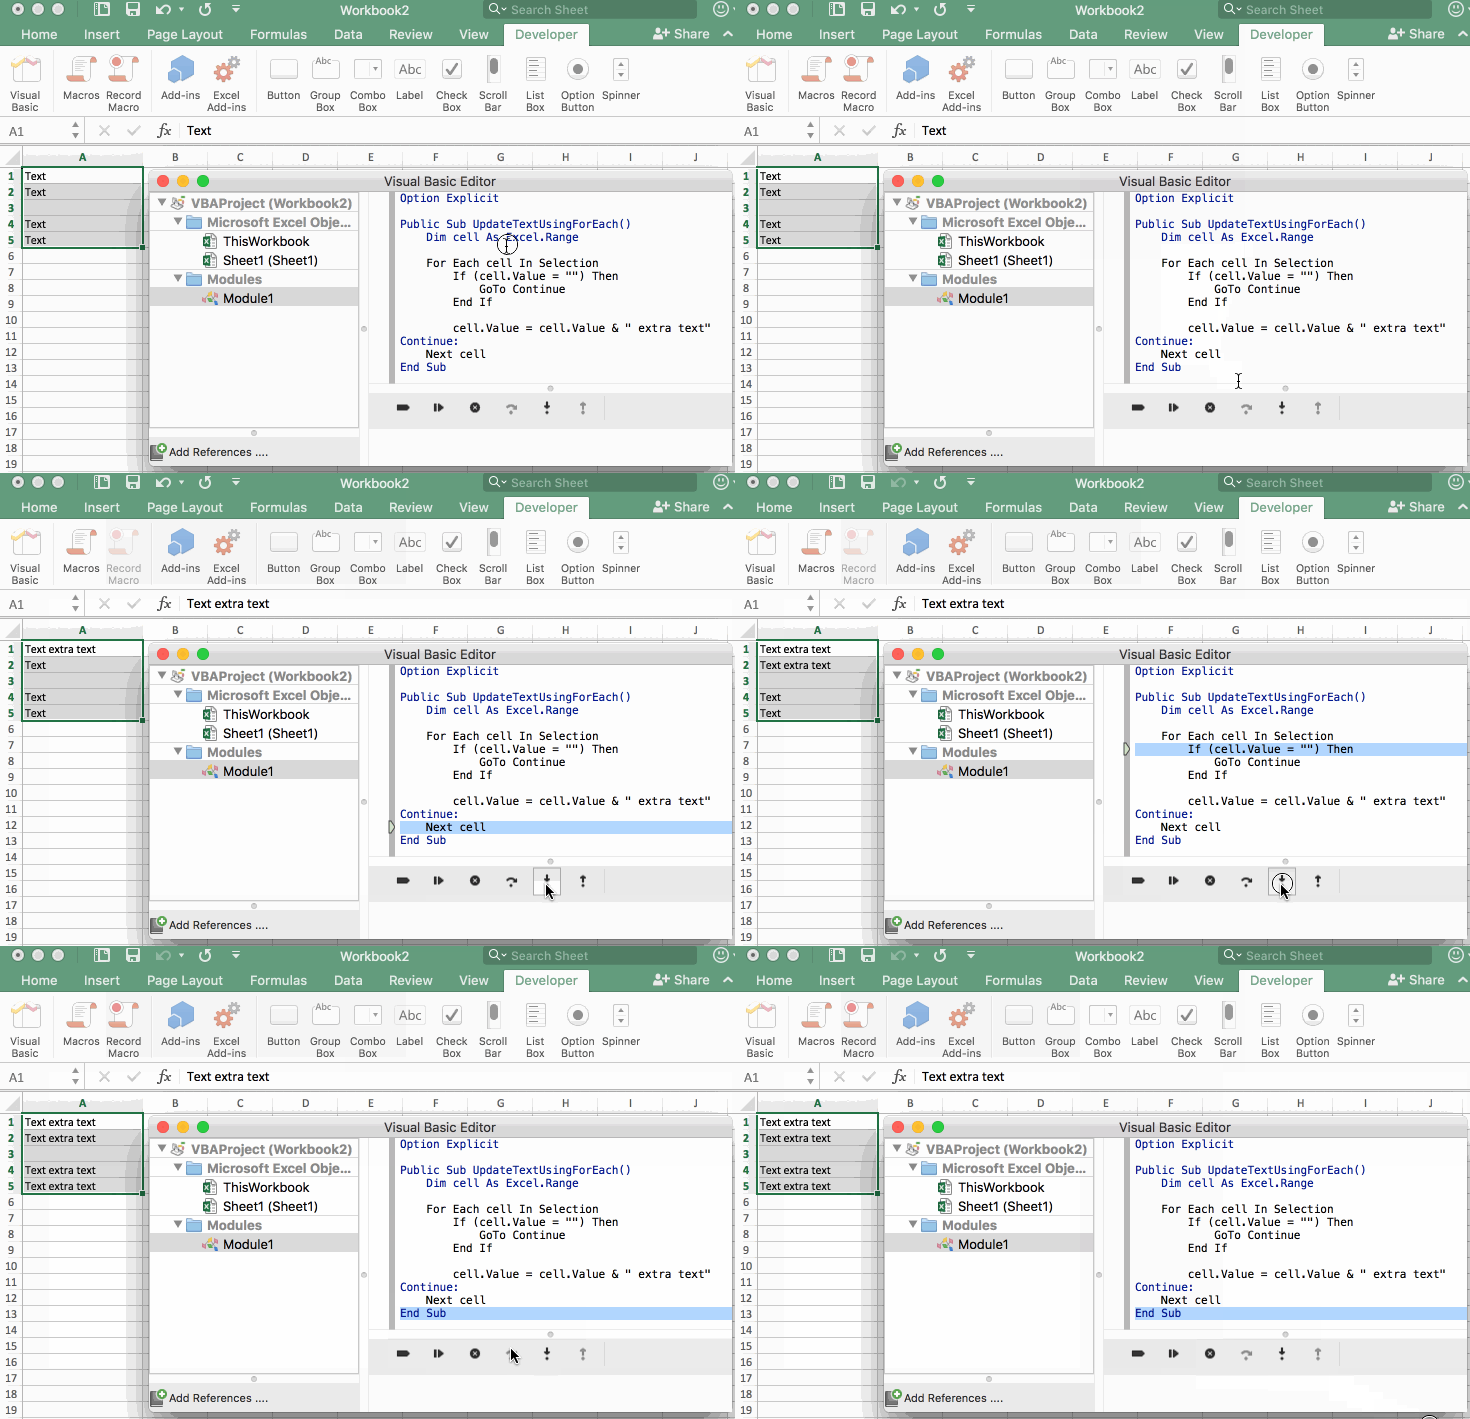
Here it is in action:

Once the code reached a cell that was blank, you see the GoTo Continue line
was executed and the rest of the For Each loop was skipped.
For Each Example with Exiting the Loop
Finally, let’s say that if you find a blank cell, that you’d like to completely stop the loop. You may need this if the user were to select a bunch of extra cells that were blank. This could help save you execution time and speed up the code as well.
Here’s an example of what that code would look like:
Option Explicit

Public Sub UpdateTextUsingForEach()
    Dim cell As Excel.Range

    For Each cell In Selection
        If (cell.Value = "") Then
            Exit For
        End If

        cell.Value = cell.Value & " extra text"
    Next cell
End Sub
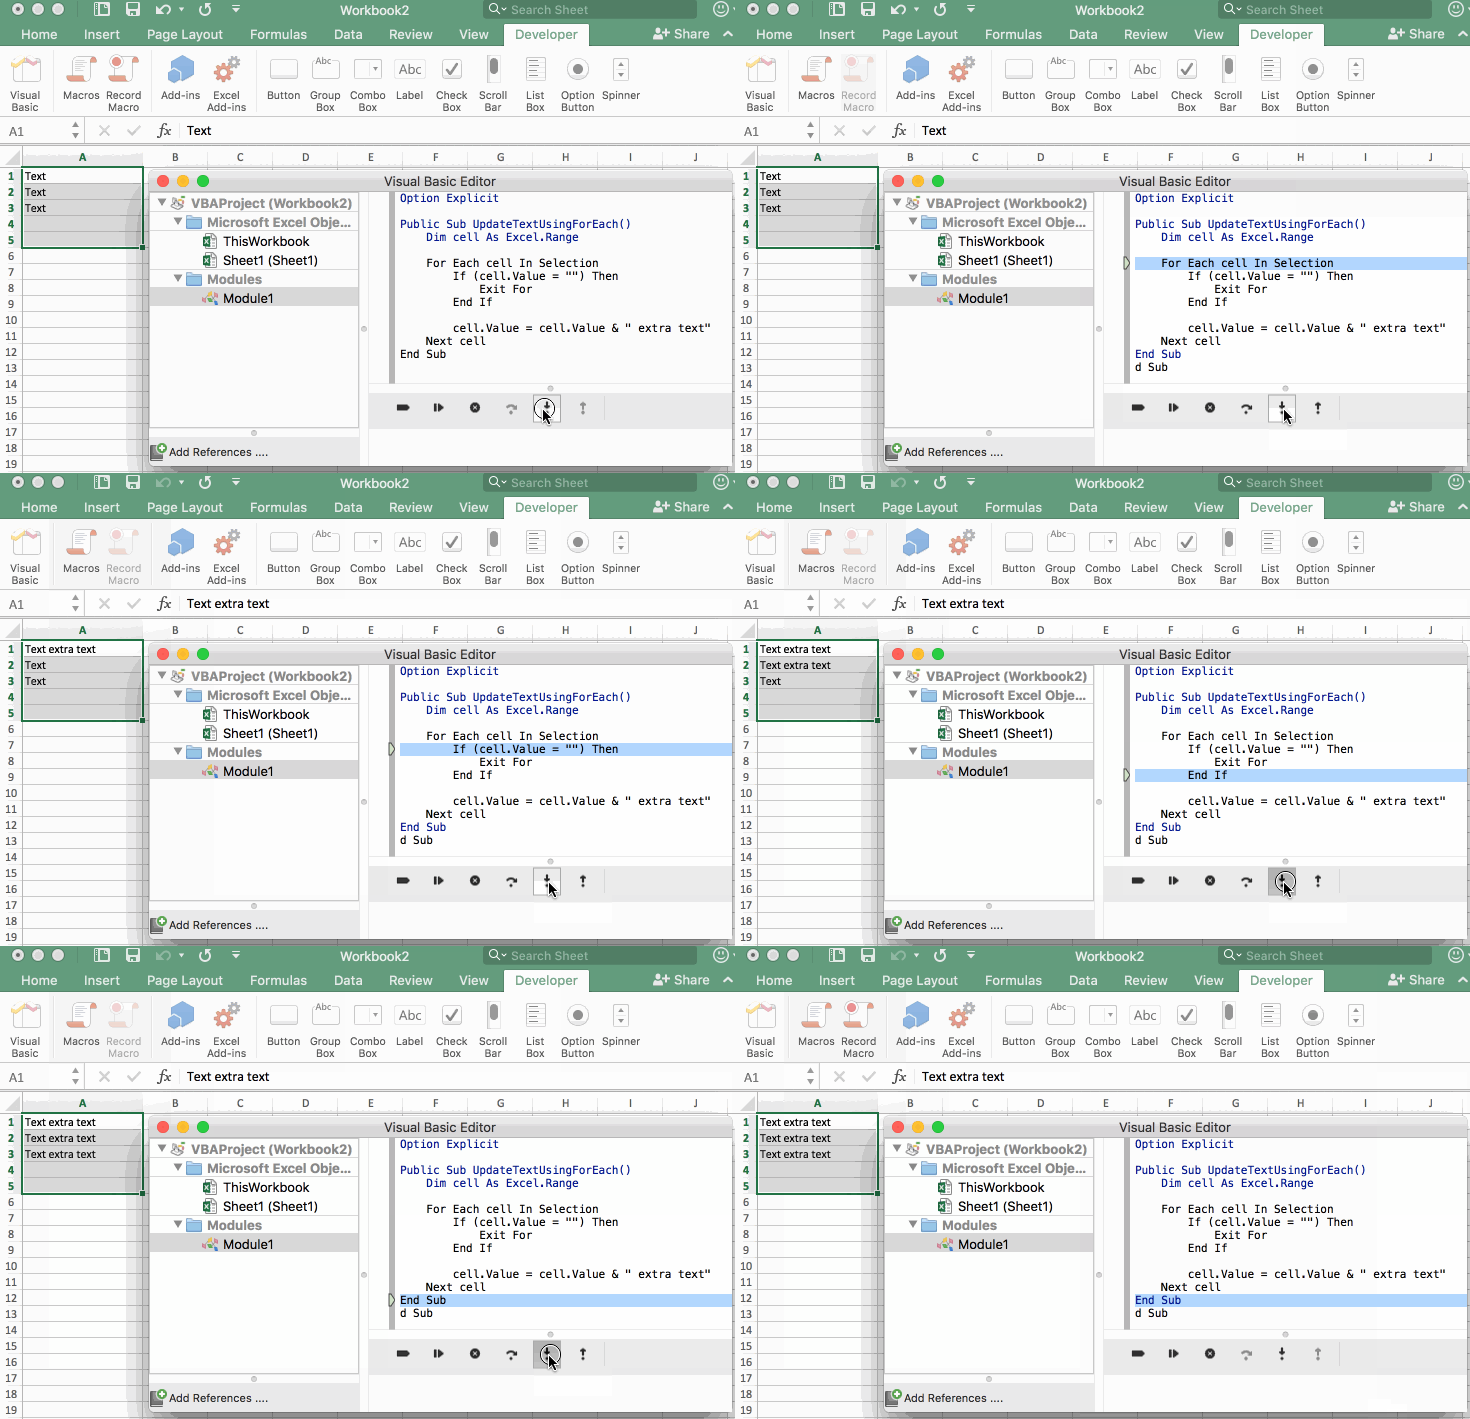
And here’s what that would look like in action:

Once we hit a cell that had blank text, the rest of the cells were skipped because we exited the loop.
By the way, don’t mind that weird extra text “d Sub” in the image. That’s just Excel VBA for Mac acting all wonky.
Order of Operation
One last thing I’d like to talk about is the order that the For Each goes
through if you have cells selected that span multiple rows and columns. Going
back to our original code, what order do you think Excel would go in if we
selected cells A1:B3? Would it go through column A first, then move on to
column B? Or would it go through the cells row by row?
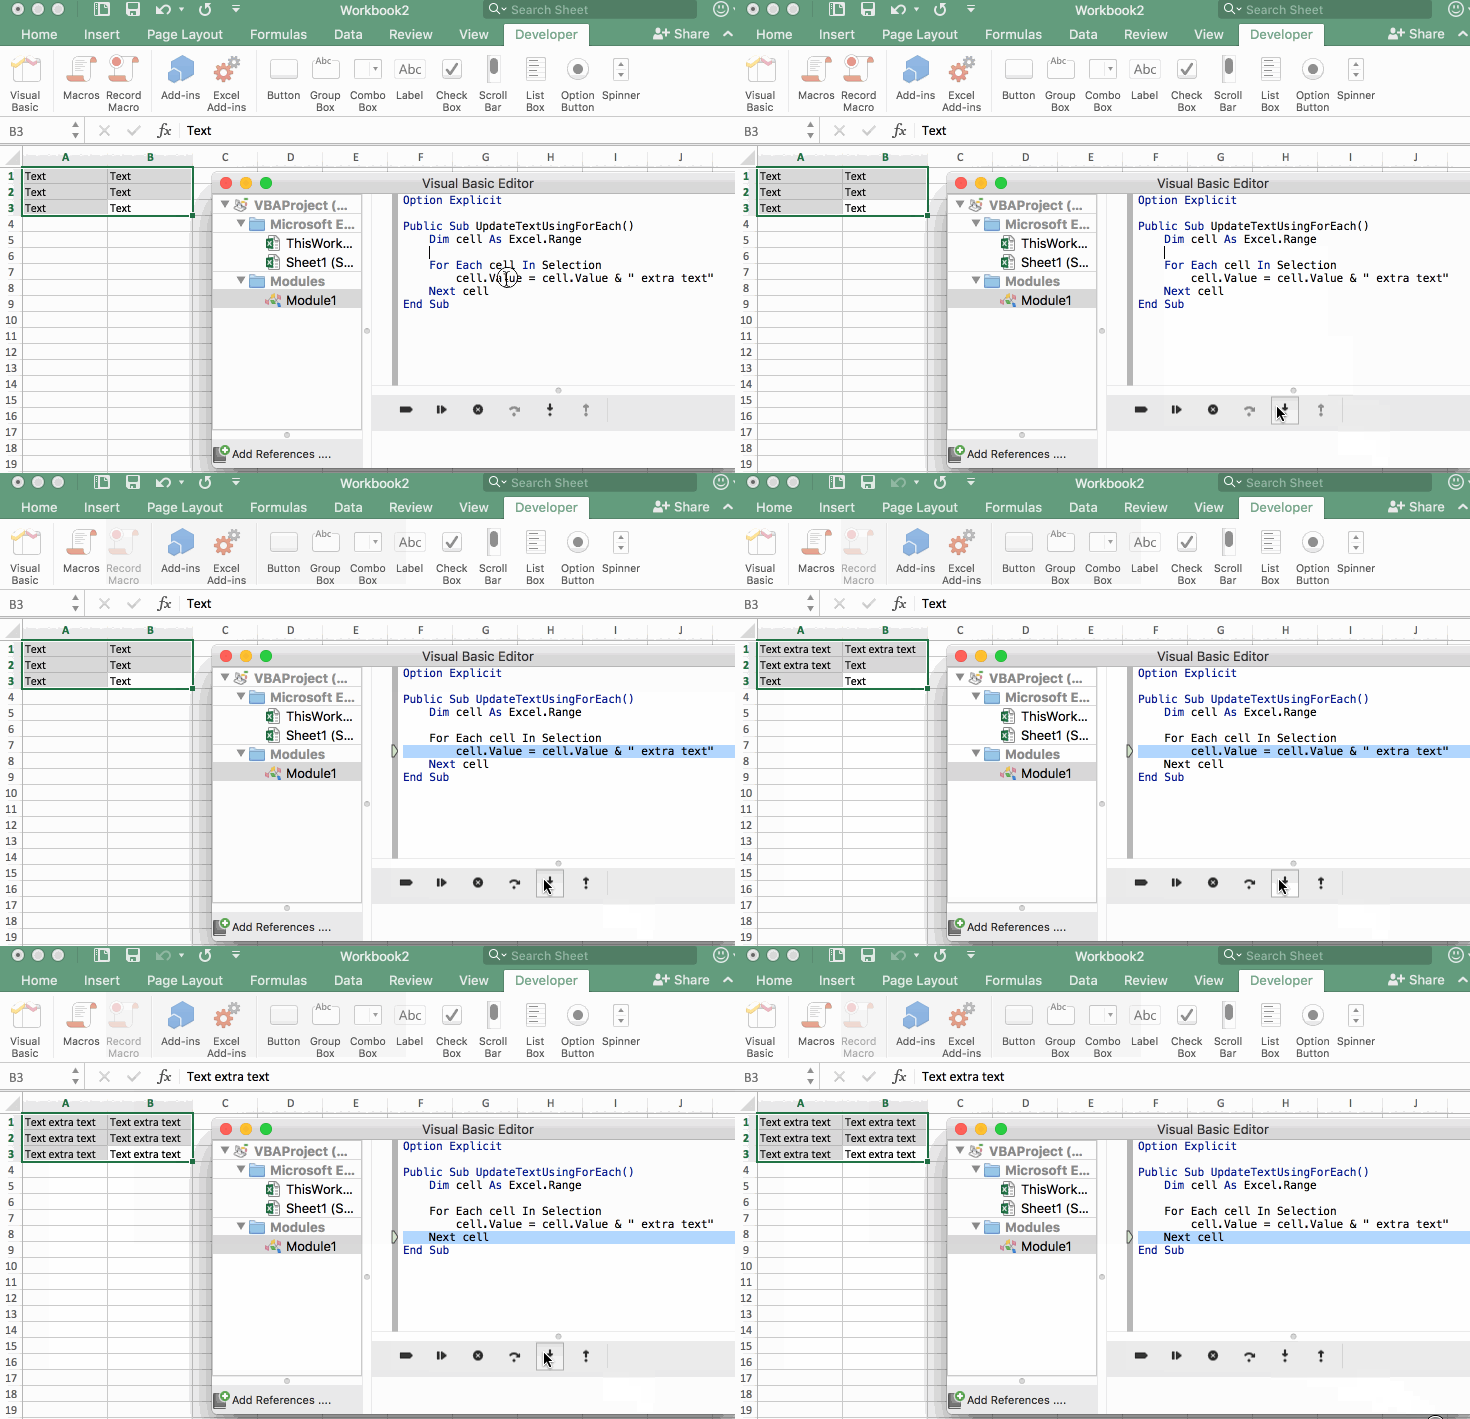
Let’s take a look:

As you can see, it goes row by row, starting at A1, then B1, A2, B2,
A3, and finally B3. This might not mean much to you now, but you never know
when you will need to process the cells in a different order. For example, what
if you wanted to start from the bottom and work your way up? For that, we’ll
need to use a different looping construct which we’ll talk about in another post.